
A visible microwave can interrupt a clean kitchen design and take up valuable counter space. Whether you’re renovating or just want neater sightlines, there are many practical ways to hide a microwave in the kitchen. This guide covers design options, ventilation and electrical safety, materials and finishes, costs, a step-by-step DIY niche project, common mistakes, and maintenance tips so your hidden microwave looks great and works safely.
Why hide a microwave in the kitchen?
Hiding your microwave:
- Improves visual flow and reduces clutter on counters
- Makes small kitchens feel more unified and less chaotic
- Keeps appliances off work surfaces for better functionality and resale appeal
Knowing how to hide a microwave in the kitchen helps you pick the method that balances style, ergonomics, and safety.
Top methods to hide a microwave in the kitchen
- Built-in cabinet niche
- Description: Create a framed cavity in cabinetry sized for the microwave; add cabinet doors or open shelving when needed.
- Best for: Integrated, custom looks; keeps microwave off counters.
- Considerations: Follow the microwave’s clearance specs; allow airflow behind and above.
- Microwave drawer
- Description: A dedicated pull-out drawer-style microwave installed below counter level.
- Best for: Islands and ergonomic cooking zones; modern kitchens.
- Considerations: Requires cabinet modification and a compatible model; good ventilation design is still essential.
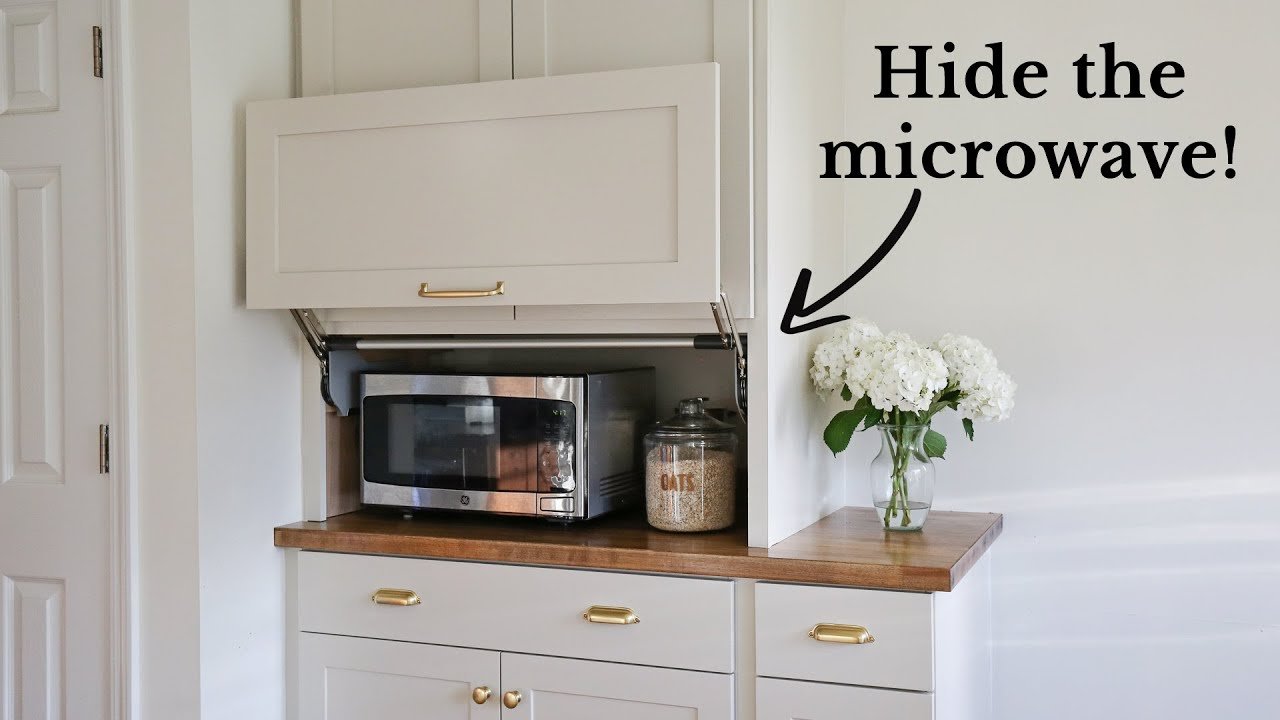
- Appliance garage
- Description: A small cabinet with a roll-up tambour or bifold door that hides the microwave and other small appliances.
- Best for: Quick concealment with minimal cabinet engineering.
- Considerations: Keep the outlet inside the garage and allow ventilation or louvered doors.
- Retractable/sliding doors or pocket panels
- Description: Sliding wood, glass, or metal panels that glide to reveal or hide the microwave.
- Best for: Seamless style continuity and flexible access.
- Considerations: Use soft-close hardware and design for easy reach.
- Hinged niche panel or false backsplash
- Description: Shallow niche with a hinged or removable panel that conceals the unit behind the backsplash line.
- Best for: Minimalist, wall-integrated designs.
- Considerations: Ensure the panel doesn’t block controls or heat vents; plan electrical access.
- Above-fridge conversion
- Description: Repurpose the cabinet over the refrigerator to house the microwave, with a door or cover.
- Best for: Using otherwise dead space; keeps counters clear.
- Considerations: Accessibility can be an issue if it’s too high—consider a pull-down shelf.
- Decorative cover or removable screen
- Description: Non-permanent cover pieces, framed screens, or sliding fronts that sit in front of the microwave.
- Best for: Budget-friendly or rental-friendly solutions.
- Considerations: Must not block ventilation while the microwave is in use.
Design tips and best materials
- Match cabinet face panels to existing cabinetry for the most seamless look.
- Use plywood or MDF for niche builds and finished veneer or paint to match other surfaces.
- Choose hardware (soft-close hinges, tambour rollers, guide tracks) rated for frequent use.
- Measure microwave dimensions and add the manufacturer’s recommended clearance for ventilation.
- Plan access to the power cord and controls; avoid designs that obstruct operation.
Ventilation, electrical, and safety rules
- Always follow manufacturer clearance specifications for airflow and vents.
- Install an outlet inside the cabinet or niche on a dedicated circuit if recommended by the microwave manufacturer and local code—hire an electrician for electrical work.
- Avoid airtight, unvented compartments; add vents, louvered doors, or perforated shelving when needed.
- Ensure panels and doors never obstruct controls, vents, or the turntable.
- Test the microwave by running it for several minutes when first installed and check for unusual heat or odors.
Costs, benefits, and limitations
- Benefits: Cleaner counters, cohesive kitchen aesthetic, and potential resale appeal.
- Costs:
- Low: Decorative cover, appliance garage retrofit — a few hundred dollars.
- Medium: Pre-made cabinet niche or remodel — several hundred to a couple thousand.
- High: Full custom built-ins, electrical relocation, or new cabinetry — several thousand.
- Limitations: Potentially higher repair access difficulty, ventilation constraints, and upfront planning for electrical and cabinetry.
Step-by-step DIY: Build a simple built-in microwave niche (intermediate DIY)
- Measure the microwave’s width, height, depth and add required clearance per the manual.
- Construct a cabinet box using 3/4″ plywood sized to the dimensions, leaving ventilation gaps.
- Fasten a shelf or support at the right depth and reinforce with cleats if needed.
- Install or relocate an electrical outlet at the back of the niche—use a licensed electrician if required by local code.
- Mock-fit the microwave: slide it in, plug it in, and run it for five minutes to confirm airflow and operation.
- Finish with trim or face-frame pieces, paint, or a matching cabinet door to integrate the niche.
Safety note: If you’re unsure about any electrical or structural work, hire licensed professionals.
Common mistakes and how to avoid them
- Short outlet or wrong placement: Plan outlet location and cord length early.
- Blocking ventilation: Always follow clearance guidelines and test with the microwave running.
- Skipping mock-fits: Temporarily install the microwave before adding final trim to avoid costly rework.
- Choosing the wrong door hardware: Use hardware rated for the weight and frequency of use.
Maintenance after hiding your microwave
- Clean vents and interiors after heavy use to prevent grease buildup.
- Test door seals and latches monthly.
- Dust and vacuum vents every three months.
- If you notice odd smells, excessive heat, or performance issues, remove the unit and inspect vents and wiring.
FAQ
Q: What’s the easiest way to hide a microwave in a kitchen?
A: An appliance garage or a decorative cover is the simplest—minimal carpentry and easy access.
Q: Can I put a microwave in a cabinet?
A: Yes, but only if you follow the manufacturer’s clearance and ventilation requirements and provide an accessible outlet.
Q: Will hiding a microwave reduce its performance?
A: Not if ventilation is adequate. Poor airflow reduces lifespan and can overheat the appliance.
Q: Are microwave drawers safer than countertop models?
A: When installed and vented correctly, microwave drawers are as safe as countertop units and can be more ergonomic.
Q: How much does a custom microwave niche cost?
A: Costs range widely—from a few hundred for simple modifications to several thousand for custom cabinetry and electrical work.
Conclusion
Hiding a microwave in the kitchen can instantly tidy your space and elevate design. Choose a solution that balances aesthetics, ventilation, and convenience. Start small: measure your microwave, sketch a plan, and try a single weekend project like a cabinet niche or appliance garage.
Need help deciding which method fits your kitchen? Share room dimensions and microwave model and I’ll recommend the best approach.