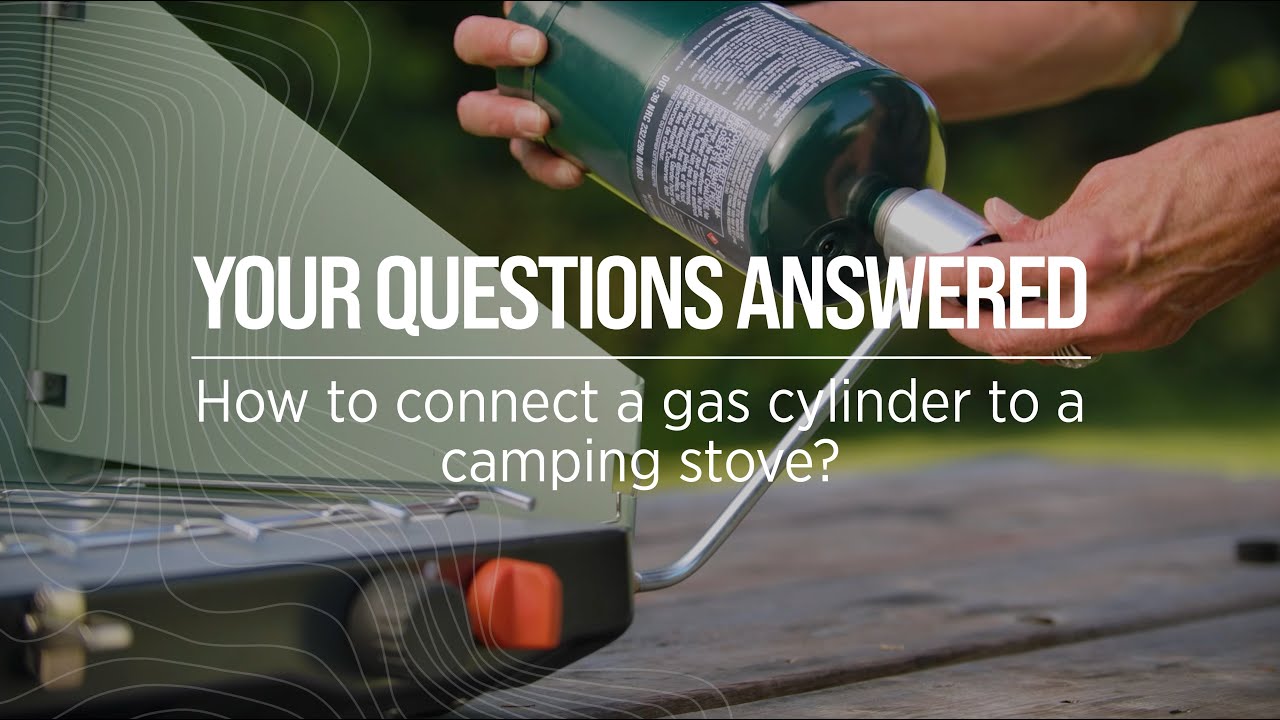
Screw the 1 lb Coleman propane canister onto the stove fitting until it seats and is hand-tight.
I’ve attached hundreds of Coleman propane camping gas canisters in the field and at home. This guide explains, step by step, how to attach Coleman propane camping gas safely and confidently. You’ll learn which fittings matter, how to check seals, what to avoid, and simple troubleshooting. Read on to set up your stove fast and keep your camp safe.

Why proper attachment matters
Attaching Coleman propane camping gas properly keeps you safe and helps your stove run well. A loose fit can leak gas. A damaged seal can cause hard-to-detect leaks. Good attachment also helps the flame stay steady and saves fuel.
I once had a stove that hissed and sputtered until I found a torn O-ring. Fixing that small part made the burner strong again. Treating attachment as a routine check will avoid most problems.
Types of Coleman propane camping gas and fittings
There are a few common sizes and fittings to know. Match the right one to your gear.
- 1 lb threaded disposable cylinders
- Used on most small Coleman stoves and lanterns. They screw on by hand.
- 16.4 oz (sometimes called 1 lb) threaded canisters
- Same style as above; varies by brand labeling.
- 20 lb grill tanks with regulator
- Needs a hose and regulator or a special adapter for long-camping use.
- Propane adapter fittings
- Allow use of larger tanks with stoves that take 1 lb cylinders. Use only rated adapters.
Know which fitting your stove needs before you buy fuel. Using the wrong fitting risks leaks or damage.

Step-by-step: How to attach Coleman propane camping gas
Follow these simple steps each time you attach a canister. Read your appliance manual first.
- Prepare the stove and canister
- Move the stove outdoors or to a well-ventilated area. Keep open flames away.
- Make sure the stove control valve is fully off.
- Inspect the canister and stove inlet for dents, rust, or debris.
- Check seals and threads
- Look at the stove’s gasket or O-ring. If it’s cracked or missing, replace it.
- Clean threads with a dry cloth. Do not use grease or oil.
- Align and attach
- Hold the canister upright. Align threads or fitting with the stove inlet.
- Screw the canister on by hand. Turn until it seats and is snug. Do not over-tighten.
- Test for leaks
- Open the stove valve slightly. If you hear hissing, close it. Turn off the valve and re-seat the canister.
- Use soapy water to check for bubbles along the connection. If bubbles appear, tighten slightly or replace the canister.
- Light and adjust
- Light the stove per the appliance instructions. Start on low and increase flame if needed.
- Watch for steady blue flame and no hissing.
These steps work for most Coleman propane camping gas canisters and stoves. If you use an adapter to connect a 20 lb tank, also check the regulator and hose for cracks and replace any worn parts.

Safety checks and testing for leaks
Safety comes first with propane. Make these checks routine.
- Visual check before each use
- Inspect canister for rust, dents, or punctures. Discard damaged cans.
- Soapy water leak test
- Mix dish soap and water. Apply around the connection. Look for steady bubbles.
- Smell and sound checks
- A strong rotten-egg smell or hissing sound indicates a leak. Move away and ventilate.
- Valve and control checks
- Make sure control knobs move freely and fully close.
If you detect a leak you cannot fix, stop and replace the canister. Never try to repair a damaged disposable cylinder.

Common mistakes and troubleshooting
Knowing common mistakes helps you avoid them.
- Cross-threading the canister
- Forceful or angled tightening can damage threads. Always line up and hand-tighten.
- Over-tightening
- Metal-on-metal damage can ruin the seal. Hand-tight is enough.
- Ignoring O-rings
- A bad O-ring causes slow leaks. Keep spares in your kit.
- Using wrong adapter or regulator
- Mismatched parts leak or reduce pressure. Use only rated adapters.
- Stove won’t light
- Check that the canister valve is open and the connection is tight. Cold canisters can reduce pressure—warm them near your body or in a warm place.
- Weak flame
- Clean burner ports. Replace old canisters. Check for any partial blockages.
- Hissing or fast gas flow
- Close the valve immediately. Test for leaks and replace the canister if needed.

Maintenance and storage tips
Care and storage keep your gear ready and safe.
- Store canisters upright in a cool, dry place away from direct sun.
- Keep canisters away from heat sources and inside temperatures below 120°F.
- Replace O-rings yearly or when they show wear.
- Carry a small leak test kit and spare O-rings in your camping bag.
- When traveling, transport canisters in ventilated areas of the vehicle.
These habits extend the life of stoves and protect against accidents.

Personal experience and lessons learned
On a wet weekend trip, I found a slow leak at the stove inlet. I tightened the canister, but the leak returned. Replacing a cheap O-ring fixed it. Since then I pack spare O-rings and a small bottle of soapy water. That saved our breakfast and kept the camp calm.
A second lesson: in cold weather, canisters give weaker pressure. I warm the canister in my hands for a few minutes and keep cooking at a lower flame. Small tricks like these matter when you’re outdoors.

Frequently Asked Questions of how to attach coleman propane camping gas
How do I know which Coleman propane camping gas fits my stove?
Check the stove manual or the inlet thread type. Most small Coleman stoves use 1 lb threaded disposable canisters. If unsure, compare the stove inlet to the canister thread before buying.
Can I use a 20 lb propane tank with a Coleman stove?
Yes, with a manufacturer-rated adapter or regulator made for your stove. Use only parts that are rated for camping equipment and follow directions to avoid leaks.
What should I do if I detect a leak after attaching the canister?
Turn the stove off, move it outdoors, and ventilate the area. Use soapy water to find the leak. If it leaks at the canister, replace it; if at the stove, replace the O-ring or service the stove.
Is it safe to tighten the canister with tools?
No. Use hand-tightening only. Tools can over-tighten and damage threads or seals. Hand-tight is secure and safe.
How do I prevent low flame in cold weather?
Keep canisters warm before use. Cook on low heat and avoid large burners. Cold reduces pressure and flow, so warming the canister helps performance.
Conclusion
Attaching Coleman propane camping gas is a simple task when you follow clear steps. Inspect parts, align threads, hand-tighten, and test for leaks every time. Keep spares like O-rings and a small leak test kit in your pack. With these habits, you’ll cook safely and enjoy reliable stove performance on every trip. Try these steps on your next outing, leave a comment with your experience, or subscribe for more camping tips.